Welcome to our “How to Create a WordPress Website for Your Small Business” guide.
We will guide you through the steps of creating your own website for your business in minutes even with zero coding or design experience.
In this tutorial guide, you’ll discover how to choose a domain name, select a reliable hosting service provider, install WordPress, customize your website with a theme or layout and much more.
So let’s dive in.
Table of Contents
What is WordPress?
WordPress is a free and open-source platform that allows users to create websites and blogs easily without any coding or design experience. It powers over 40% of all websites on the internet due to its flexibility and a vast library of themes and plugins.
Business owners can customize their websites to their specific needs, and create a website that represents their brand and stands out from the competition.
Additionally, WordPress is built with SEO in mind, making it easy for search engines to crawl and index content. Therefore, it is an excellent choice for business owners looking to create a website with a powerful tool for building a strong online presence.

Do I need coding or design experience?
One of the main advantages of using WordPress to create a website is that you do not need any coding or design experience.
The platform provides an easy-to-use interface that allows you to customize your website using pre-made themes and templates. This means that business owners without technical skills can still create a professional-looking website with ease.
Moreover, the large community of developers creating and sharing plugins, themes, and other tools on WordPress makes it easier to add new features without hiring a developer or learning how to code.
With WordPress, anyone can create a professional-looking website that can help promote their business and attract new customers.
How Can I Create a WordPress Website for My Small Business?
To create a website for your small business, here’s the step-by-step guide:
Step 1: Choose a Domain Name
The first step in creating your website is to choose a domain name.
A domain name is the address of your website and should be easy to remember and relevant to your business.
Tips for Choosing a Good Domain Name
When choosing a domain name, it’s important to consider your branding and the purpose of your website. You want your domain name to be memorable and easy to spell, as well as relevant to your business.
You should also avoid using hyphens or numbers in your domain name, as this can make it more difficult for customers to remember.
Additionally, you may want to consider using a domain suggestion tool to help you come up with ideas. These tools can provide suggestions based on keywords related to your business or industry.
Once you have a list of potential domain names, you’ll need to check if they’re available for registration.
Best Registrar For Your Domain Name
There are good domain registrars like Namecheap, that you can use to search for and purchase your domain name. Some web hosting companies, such as Bluehost, offer a free 1-year of domain registration when you host your domain on their server.
Key Point: Overall, choosing a good domain name is an important first step in creating your WordPress website. A well-chosen domain name can make a big difference in the success of your website and your business’s online presence.
If you still want to learn more about picking the best domain for your business. I went in-depth in this article: How to choose the best domain name for your website.
Step 2: Use The Best WordPress Hosting Company
When creating a WordPress website, the next step is to find a hosting company that specializes in WordPress hosting.
What is WordPress Hosting?
WordPress hosting refers to web hosting specifically optimized for WordPress sites, which can provide faster loading times, better security, and easier management of your website.
Types of WordPress Hosting
There are several types of WordPress hosting, including shared hosting, VPS hosting, dedicated hosting, and managed WordPress hosting.
- Shared hosting is the most affordable option and is suitable for small websites with low traffic.
- Managed WordPress hosting is the most expensive but offers the most comprehensive support, security, and optimization features.
- VPS hosting and dedicated hosting offer more resources and greater control over your website but come at a higher cost.
How to Choose the Right WordPress Hosting Company
There are a lot of options to consider when choosing a WordPress hosting company, some of the essential factors to consider are:
- Uptime, performance, security, and support.
- Good reputation and positive reviews from other users.
- Additionally, consider the pricing, features, and scalability options provided by the hosting company.
If you want a reliable and affordable option that offers excellent performance, security, and support, then Bluehost is worth considering. Bluehost has a good reputation in the industry and offers various pricing plans to fit different needs and budgets.
Additionally, Bluehost offers easy scalability options, allowing your website to grow as your business expands.
Sign up now and take advantage of their excellent features and support to help you create a successful online presence.
Step 3: Install WordPress
The next thing to do here is to install WordPress (WP).
To install WordPress, you’ll need to sign up for a hosting account first. If you haven’t, Click here to signup for the basic $2.95 / month plan + free domain.
Upon successful signup, your account and login details will be sent to your email.
How to Install WordPress (step-by-step).
- Log into your Bluehost account: Log into your Bluehost Cpanel account using your account credentials (which are your email and password).
- Launch the “One-Click WordPress Install: In the control panel, search for “Install WordPress” to launch the installation process.
- Select your domain name: This is the exact domain you got earlier when signing up with Bluehost. Select this domain to install WordPress on it.
- Fill out other information: Your site name, tag, WP username, password, etc… a strong password that is different from your Cpanel details is recommended.
- Start the installation: Click on the “Install” button to start the installation process. This might take a few minutes, depending on your internet speed.
Next,
- Log into WordPress: Once the installation is done, you can now log into your WordPress dashboard using the credentials you set up earlier.
To log in, add /wp-admin to your domain URL (e.g. www.yoursite.com/wp-admin) and enter your username and password. You will be redirected to the WP Dashboard, where you can start customizing your site.
NEXT,
Step 4: Select a Theme or Layout
Themes and layouts are pre-made designs that determine the appearance of your website, including its layout, colours, and fonts. There are two types of themes and layouts to choose from which is the free and premium theme.
Free themes and layouts are available on the WordPress marketplace and can be used without any additional cost.
Where to Find Free Themes and Layouts
The WordPress marketplace offers a wide range of free and premium themes and layouts, and you can filter your search results based on specific features or design styles.
To find free themes and layouts for your website.
In your WordPress dashboard.
Go to Appearance >> Themes >> Add New.
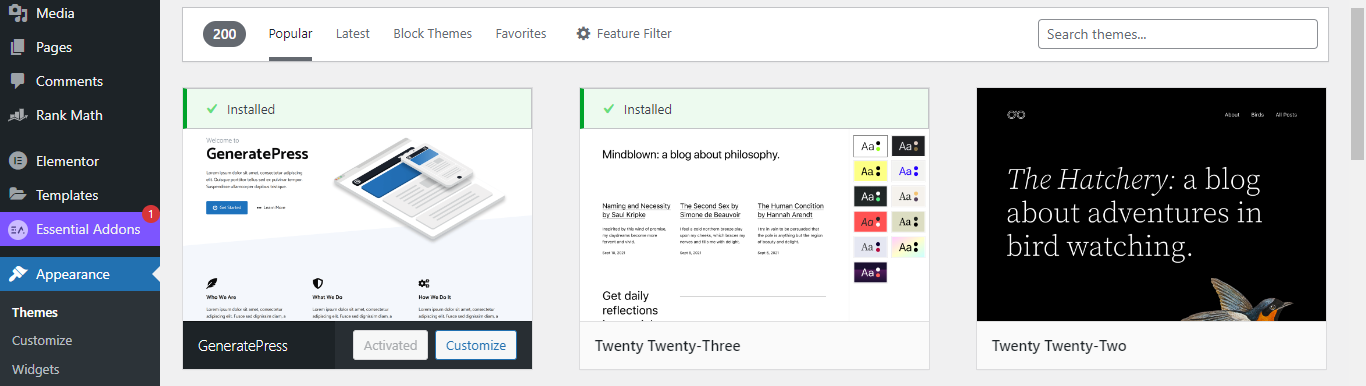
Some popular free WordPress themes you can try out:
Premium themes and templates, on the other hand, are often created by professional developers and come with additional features and customizations. You can go to popular marketplaces like Themeforest.com.
Key Takeaway: When choosing a WordPress theme or layout, consider the needs and goals of your business, as well as the preferences of your target audience.
Step 5: Install Important Plugins
What are plugins? Plugins are essential for any WordPress website, and using them can help improve your website’s performance, security, and overall user experience.
While you don’t need to install every single one, a few important ones for the smooth running of your website are:
- Rank Math: This plugin helps optimize your website for search engines, making it easier for potential customers to find your business online.
- Site Kit by Google: This plugin integrates your WordPress website with Google’s various tools, including Google Analytics and Search Console, giving you valuable insights into your website’s performance.
- WP Rocket: This plugin can improve your website’s loading time and speed by optimizing the code, reducing file sizes, and caching content.
- Wordfence: This plugin helps protect your website from security threats such as hacks and malware, scanning your site in real time and blocking malicious traffic.
- Elementor: A popular visual page builder plugin that allows you to create custom designs and layouts for your website without needing to know how to code.

Install A WordPress Plugin On Your Website
To install a WordPress plugin on your site, follow these steps:
- Log in to your WordPress dashboard.
- Go to the “Plugins” section from the left side menu.
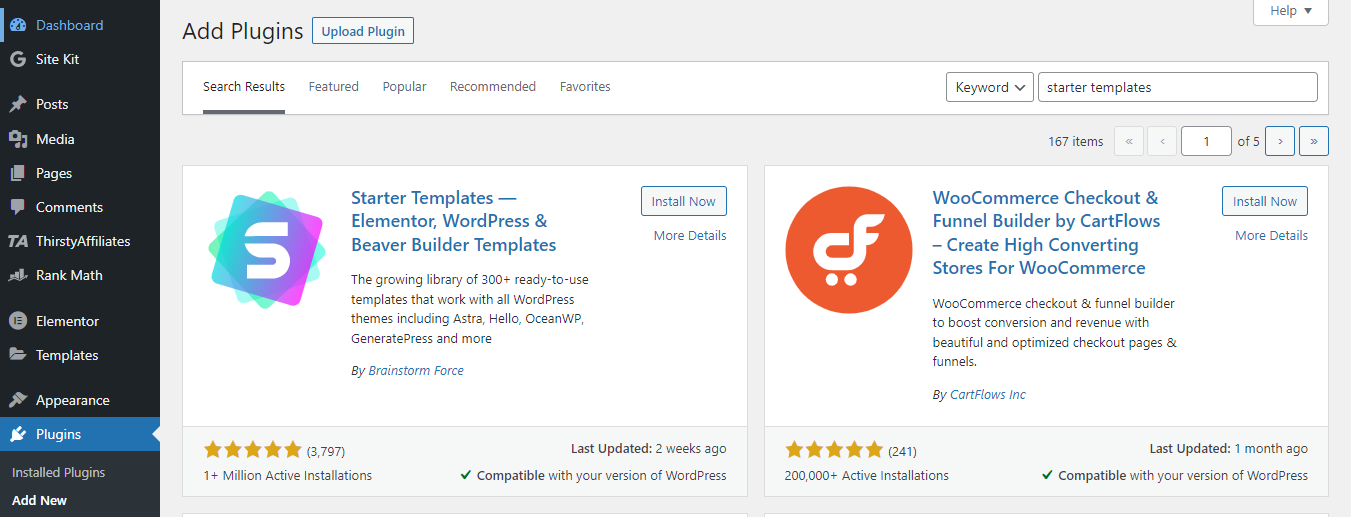
- Click on the “Add New” button.
- Search for the plugin you want to install, such as “Rank Math”.
- Click on the “Install Now” button.
- After the plugin has been installed, click on the “Activate” button.
- Configure the plugin settings if necessary according to your need.
If you read this start a blog post, I went in-depth in my explanation
Note: It’s important to keep your plugins updated to ensure they continue to function correctly and provide optimal security.
Step 6: Create a Menu
A menu is a navigation tool on your website that allows users to easily access different pages or sections of the website.
Menus are usually located at the top or side of a website and typically include links to the home page, about page, contact page, and other important pages.
To create a menu in WordPress, follow these steps:
- Log in to your WordPress dashboard.
- Click on the “Appearance” tab on the left-hand side of the screen.
- Select the “Menus” option from the dropdown menu.
- Click on the “Create a new menu” link at the top of the page.
- Enter a name for your menu and click the “Create Menu” button.
- Choose the pages or categories you want to add to your menu from the “Pages” or “Categories” sections on the left-hand side of the screen.
- Drag and drop the pages or categories to arrange them in the order you want them to appear in your menu.
- Select the “Display location” options for your menu, such as the primary navigation or footer menu.
- Click the “Save Menu” button to save your changes.
That’s it! Your menu should now be created and visible on your website.
You can go back to the “Menus” section in your dashboard at any time to make changes or add new pages to your menu.
Step 7: Customize Your Website
In this step, we will introduce two tools that will help you customize your website to your liking and with ease. These tools are Starter Templates and Elementor.
- Elementor is a drag-and-drop page builder plugin that allows you to customize your website’s layout and design without needing to know any code.
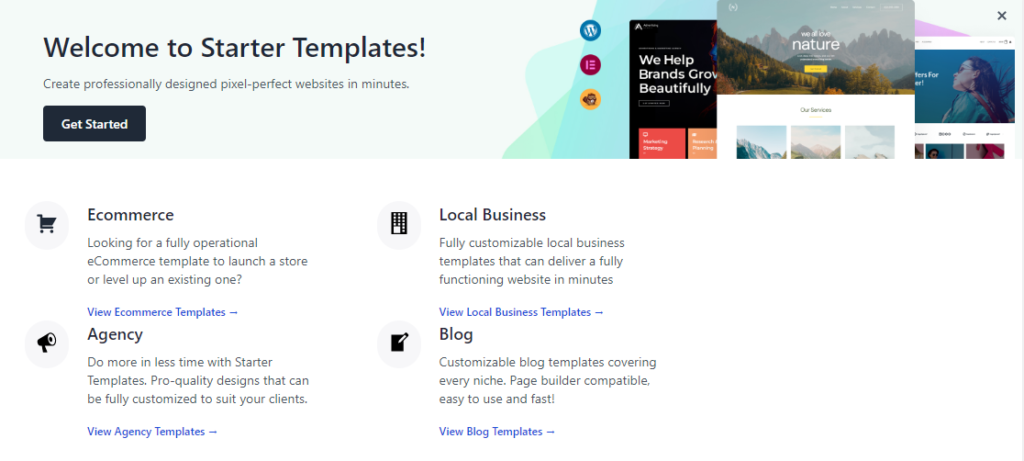
- Starter Templates is a WordPress plugin that offers a library of pre-designed website templates that you can use as a starting point for your website.
How to Use Starter Templates to Customize Your Website
- First, Search for these two important plugins – Elementor and Starter Templates from your WordPress dashboard. Then install and activate.
- Once installed, navigate to the Starter Templates tab in the WordPress dashboard. Goto Appearance > Starter Templates
- Choose a template that best fits your business needs. You can sort it out by business categories or type in your business to see template samples.
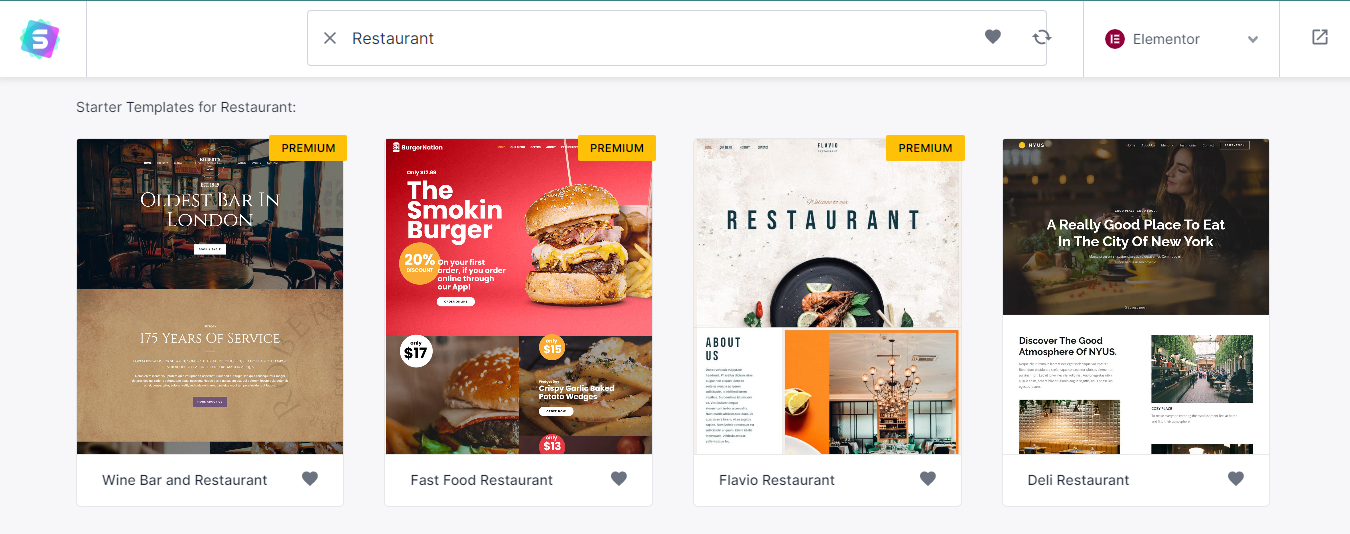
- Next, preview it and import it into your website with just a few clicks.
- Once the template is imported, you can customize it to your taste using Elementor.
Using Elementor to Customize Your Website
- After importing your template, navigate to the page or post that you want to customize.
- Click the “Edit with Elementor” button to launch the Elementor editor.
- Use the drag-and-drop interface to customize the design of your website to your own taste. You can add new elements such as text, images, and videos, and adjust the layout and style to match your branding.
- Experiment with different design options until you are happy with the final result.
- Finally, save your changes and preview your website to ensure everything looks great.
In summary, customizing your website with Starter Templates and Elementor is easy and fun. These tools offer a wide range of customization options that allow you to create a website that is unique to your business.
Therefore, let your creativity run wild and have fun creating your dream website with WordPress.
Key Takeaways
- A domain name is a crucial part of your website’s identity.
- WordPress hosting is essential for your website’s performance and security.
- Themes and layouts determine the look and feel of your website.
- Customizing your website is easy with Starter Templates and Elementor.
Also Read: SEO Tips to Rank Your Business Website on Google
How to Create A Business Website Summary
Here is a summary of how to create a WordPress website for your small business.
WordPress is a powerful platform that allows users to create and manage their own websites with ease. In this article, we covered the basics of choosing a domain name, finding a hosting company, installing WordPress, and customizing your website with themes and plugins.
We also discussed in detail, the advantages of WordPress, including its user-friendly interface and vast community of developers. By following the steps outlined in this article, anyone can create a professional-looking website for their small business.
I hope you find this WordPress business website creation tutorial helpful.
Let me know in the comment
Frequently Asked Questions
Is coding or design experience Needed to create a WordPress website?
No, coding or design experience is not required to create a WordPress website. The process has become much easier, and there are many drag-and-drop page builders available, such as Starter Templates and Elementor, which allow users to customize their websites without any technical skills.
What is the first step in creating a WordPress website?
The first step in creating a WordPress website is to find a WordPress hosting company. This is where your website will be hosted, and it’s important to choose a reliable company that provides good customer support. Many hosting companies offer one-click WordPress installation, making it easy to get started.
What is a domain name, and how do I choose one for my website?
A domain name is an address that people use to access your website. It’s so important to choose a domain name that is easy to remember and relevant to your business. You can check the availability of domain names and register them through a domain registrar, such as GoDaddy or Namecheap.
What is a theme or layout in WordPress, and how do I choose one?
A theme or layout is the design and layout of your website. WordPress has a marketplace of thousands of themes to choose from, and you can also find many free themes. It’s important to choose a theme that is compatible with your business and has a layout that is easy to navigate.
How do I customize my WordPress website?
You can customize your WordPress website using a drag-and-drop page builder plugin, such as Starter Templates and Elementor. These plugins allow you to easily add and remove content, change the layout and design, and create custom pages.